The problem of inadequate or no airflow can be caused by issues with the compressor, the airbrush, or the air hose. Lack of adequate air can result in no paint flow, grainy spray or splattering, skipping, or chronic clogging.
If you suspect low airflow to the airbrush and you are using a tankless compressor, check the air filters. You can easily to this by comparing the airflow from the compressor with the filter removed. Air regulators can leak and in this case you can usually hear the leak. Compressors with tanks have a pneumatic switch and check valve. Here again, you can usually hear the leak. More than likely it will be the check valve. Also check for leaks at the drain cock for the tank.
You can check for leaks in the hose and fittings with soapy water.
Low airflow from the airbrush is more often caused by a restriction of the space between the aircap and the nozzle. This can be caused by paint build-up on the internal surface of air cap: Fig 1. This is easily solved by cleaning the air cap with a suitable solvent and rolled up tissue, toothpick with cotton fuzz, or interdental brush.
The space between the aircap and nozzle can also be restricted if the nozzle has become flared: Fig 2. This usually occurs from too much force used when seating the needle after cleaning. This is why I recommend seating the needle while watching material flow. I demonstrate this technique in my video on cleaning the airbrush (bottom of this page).
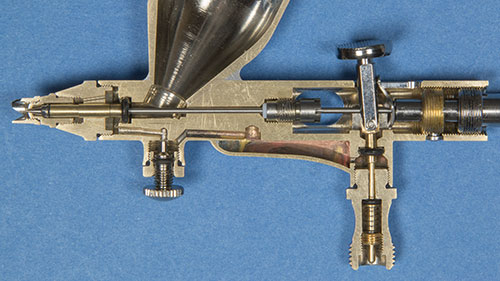
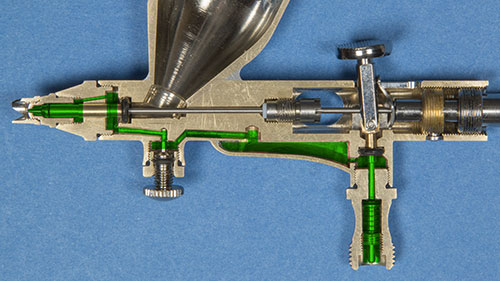
Although not common, but one last thing to check is the rubber “O” ring in the airvalve. This is more likely in an old airbrush where the “O” ring might be breaking down and fragments of rubber start blocking the air passage.