To date, Dragon has attempted to produce every basic version of upper hull with the exception of the M4A3E2. The key word here is attempted, and the quality of their latest Sherman kits has improved dramatically over some of their earlier, less sophisticated efforts. It can be a bit confusing and frustrating for the unknowing who might expect a similar execution across the entire line. I’ve attempted here to provide a summary overview along with a comparison of some of the alternatives. For clarification, the links will provide images of the respective kits.
Dragon typically molds the upper hull with separate engine grills as in
their M4A3/M4A2 hull,
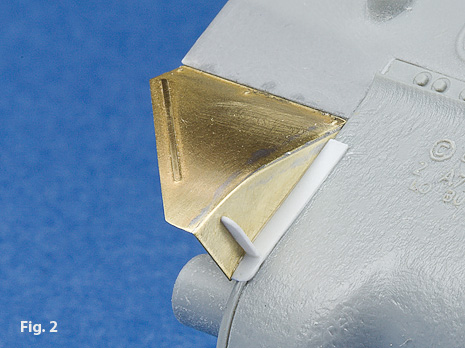
Fig. 1. The fenders are supplied as photo etched pieces. The photo etched fenders have the advantage of a thin cross section, Fig. 2, but add a degree of difficulty to the kit. A detailed explanation of how to work with Dragon’s fenders can be found here.

The Dragon hull offers the improvement of raised weld seams, however,
they have molded the gowser bin in place and it has to be carefully removed.
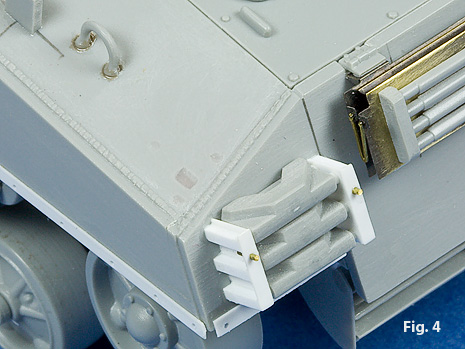
I also prefer to fill the mounting detents for the taillights and brush
guards, Fig. 3. The same hull is used for the M4A3E8
kit in which case
you need to fill the slots that locate the racks for spare track storage.
In actuality, I fill the slots for the track storage racks anyway, because
I do not use the poorly done kit rack. Fig. 4, shows the growser bins
removed, the location detents have been filled, and I have quickly created
a new spare track rack from sheet and square styrene stock.
One of Dragon's newer releases is the M4
Normandy, Fig. 5. The hull is nicely
molded with raised weld seams, and appears to be dimensionally correct,
Fig. 6.
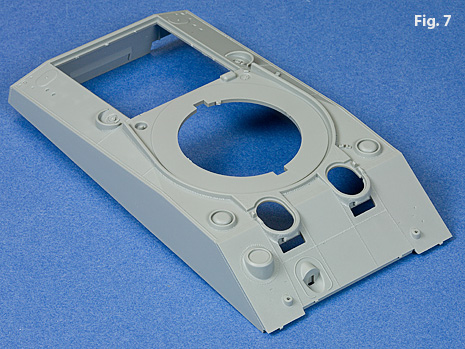
Dragon offers a very well done Direct Vision welded hull boxed as
an Initial
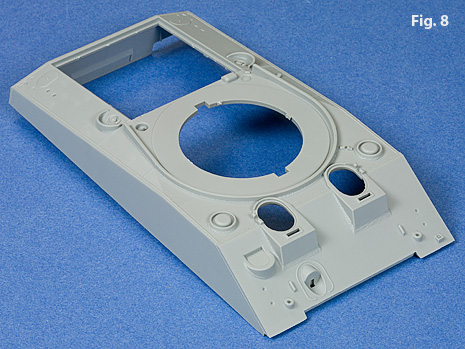
Production M4A2, Fig 7. Another
M4A2 is their equally well done Tarawa and
Sherman MkIII Mid-Production versions with welded hoods, Fig. 8.
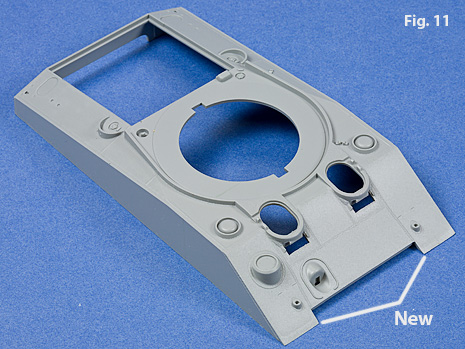
Dragon latest offering is an M4 Direct Vision. The rear hullplate is
the more vertical type , Fig. 9. By contrast, the Normandy hull plate
is shown in Fig. 10. The front of the hull is basically the M4A2 Direct
Vision hull with the fender notch filled in, Fig. 11. In fact, you can
still see a slight indication of where the notch was.
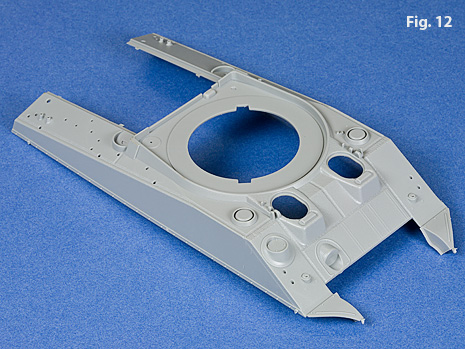
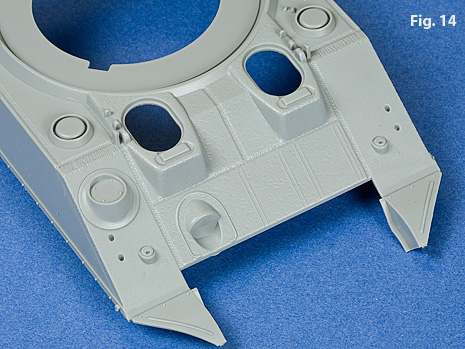
In stark contrast, the Dragon M4A4 is
an earlier attempt with a mysterious representation of weld
seams, Fig. 12, 14. In this case I would highly recommend passing
on the Dragon kit in favor of the more accurate Tasca
kit, Figs. 13, 15.


The most recent release from Dragon is their Composite
PTO, Fig. 16.
The hull is very well done and is a welcome addition to the Sherman lineup.
However, the original kits suffer from some puzzling errors. Dragon
elected to include the wrong lower hull, omit the lower turret half
for the high bustle turret, and provide some of the poorest instructions
to date. From what I understand, Dragon is now providing the correct lower hull and additional turret ring. Initial errors aside, this kit can be built up into a very
nice model.
Dragon has kits depicting all three styles of cast hulls, but again, they
vary widely in quality of execution. Their latest addition is the M4A1
Direct Vision,
Fig. 17. It is nicely done and correctly dimensioned. The casting texture
is very restrained.


Dragon’s intermediate style M4A1 is
currently out of production, Fig. 18, 20. The hull has very heavy casting
texture and is two scale inches too wide. The sides of the hull are nearly
vertical rather than sloped at 4° as they should be. The excessive
width is quite evident when you compare the distance from the hull side
to the turret splash guard (dimension shown in red, Fig. 18). If you want
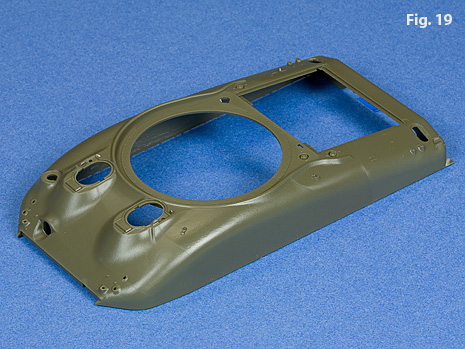
an intermediate M4A1 hull, a better choice would be the Tasca
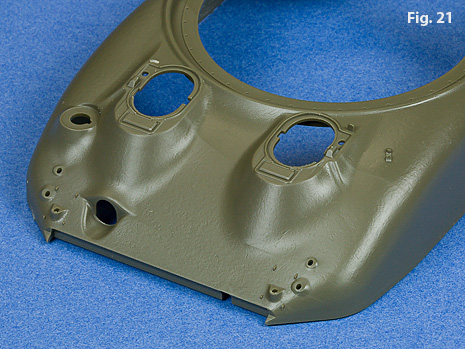
kit, Fig. 19. However, for my taste, the contours
around the drivers’ hatches of the Tasca kit lack a certain subtlety, but
the hull dimensions out properly and the sides are correctly angled. Figs.
20,21 provide an up close comparison between the Tasca and Dragon kit.
If you want to use the Dragon kit and correct the width, I have illustrated
a method here.


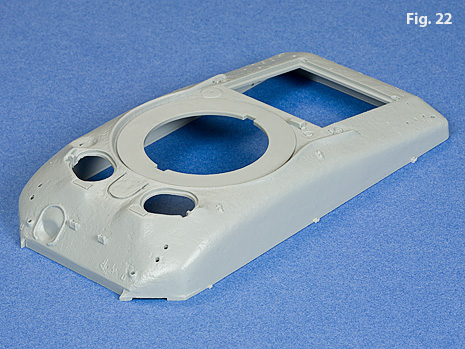
The final cast hull style is included in Dragon’s Operation
Cobra release,
Fig. 22. The casting texture is still heavy, but more restrained than
their earlier intermediate release. The hull appears to be dimensionally
correct. The only other choice available in this style hull is the Italeri
release, Fig. 23. The sides on the Italeri appear to be flat with
a sharp angle between the hull top and side.

The various reproductions of the Sherman cast hull have their devotees.
It is not an easy shape to capture as can be seen in the wide variation
of interpretations. I think it is interesting to note that the correct
rendering of shape is not so much related to technology as the skill of
the creator. Fig. 24, is the old Monogram kit that I built when it was
newly issued (it is the sole survivor of my original foray into armor and
it shows it). However, compared to the newest Tasca offering, Fig. 25,
I think the shape and proportion hold up quite well. It is a testimony
to the skilled pattern makers of the old Monogram and a reminder that,
CAD/CAM in itself does not insure a correct shape. There is no substitute
for a “good eyeball.”


One of the Mysteries
of the Red Dragon is the two different ways the rear
most panel of the M4 engine deck has been molded. In the Composite PTO
kit, the rear most panel is molded in-place (as it should be), Fig. 26.
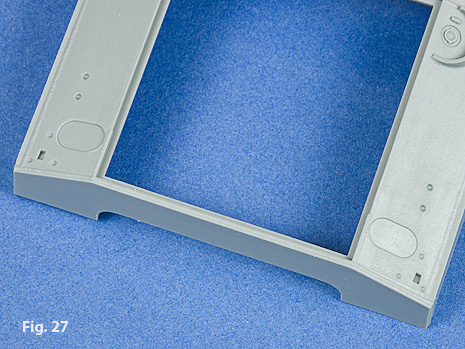
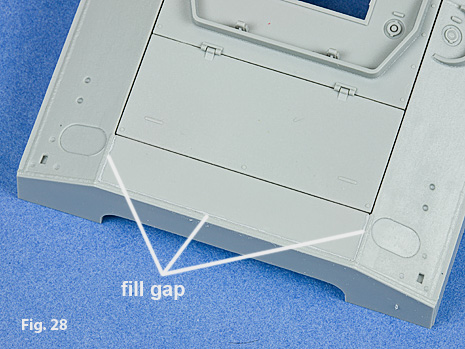
The Normandy kit has the same panel molded separately, Fig. 27. This means
that you need to fill the gap in the panel, Fig.28.
I’m not sure what the advantage is to molding the hulls with separate
engine deck panels, but since that is what it is, extra care needs to be
taken to correctly position the rear deck pieces so that the gaps are balanced.
Here you can see that the pieces have been pushed all the way to the left,
Fig. 29. The rear deck pieces are a little thin and I like to reinforce
the joint with an additional piece of styrene,Fig.30. I take special
care to cement the outside edges so that cement does not flow into the
panel joint.