
Every P-38 kit has its’ issues. In real life, the P-38 was not an easy airplane to build and this has proven to be the case with models as well. The most current of the 1/48th scale P-38 kits is produced by Academy. The kit has been issued in several versions and most recently under the Eduard label. My first attempt at constructing this kit was not a happy experience. My usual techniques were unsuccessful at yielding a straight airframe. The basic lack of structure in the area of the main gear leaves the booms very susceptible to distortion.

By taking some care and using a few simple jigs, it is possible to work around these issues and have a well aligned airframe without having to resort to some extraordinary “after the fact” rescue surgery. Keep in mind that when this kit was drawn up, the mating surfaces for the booms were actual mirror images so this process is simply undoing the distortion that developed when the parts came out of the mold.
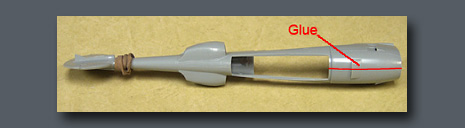
Assembly of the booms begins by rubber banding the aft section together to maintain some general alignment while the front portion of the nacelle is carefully aligned and glued. Pay special attention to the molded detail for guides. Because of the circular cross-section, the front portion of the nacelle exhibits the least distortion and after the halves are cemented together, it is the most rigid portion of the boom structure.
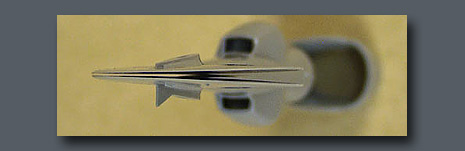
This photo shows the warpage that exists at the area of the vertical stabilizer after the nacelles are glued up. The difficulty here is how to bring these surfaces together and keep them in alignment with the engine nacelle.
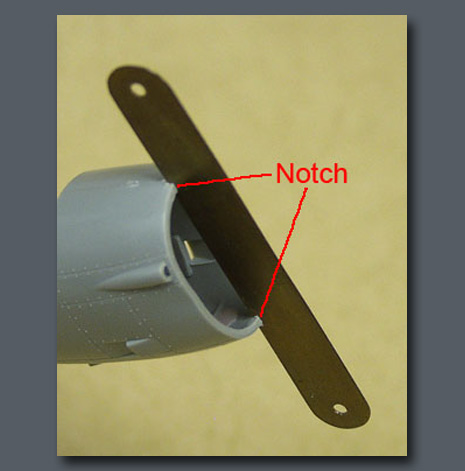
Using the joints as a guide, I cut small notches in the front of the nacelle to accept a piece of .010 sheet brass.
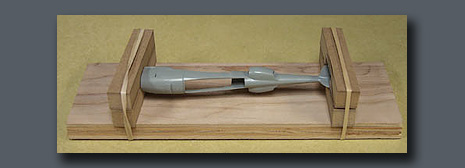
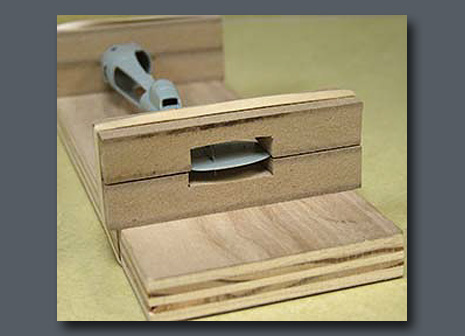
The boom was then mounted in a simple jig that is made from a base of plywood and 4 blocks held together with rubber bands. While in the jig, cement was applied to the seams.
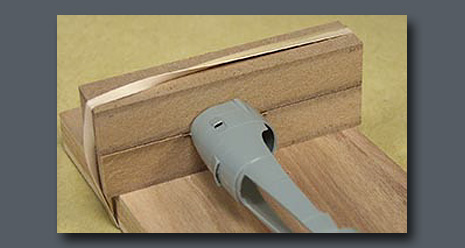
Also, while in the jig you need to install the wheel well or the gear doors depending on how you are building the model.
Since I was doing the model with gear up, I cemented a piece of sheet styrene inside the boom to add some additional stability that would have been provided by the gear well. Do this before removing the structure from the jig.
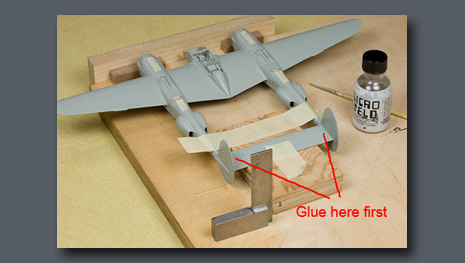
The first step in mating the booms to the wings begins by making sure everything is square when viewed from above. In this case, I have the nacelles resting on the base with the fronts of the nacelles butted against a flat surface. The horizontal stabilizer is resting on a block which slightly elevates the vertical stabilizers off the base and maintains the correct angle. Pieces of masking tape hold the main components in position. A square is used to check the alignment of the vertical stabilizers. When everything is square, cement is applied to the joint between the horizontal and vertical stabilizers.
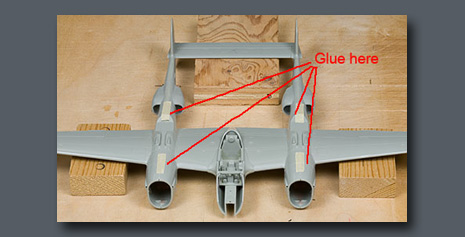
A final check of the fit at the wing and boom joint is done with supporting blocks under the wings. The wing blocks are positioned so that the wing tip height from the flat surface are equal side to side. Cement is then applied to these joints. With a little care and creativity, a very well aligned airframe can be constructed.