Paul Budzik Workbench

These pages are odds and ends of some tools and materials that I find, at the least useful, if not essential to have on my workbench.  This is not meant to be a definitive list of useful tools, nor is it meant to be a collection of reviews.  They are presented in no particular order.  My goal is simply to briefly illustrate what I use and I leave it to you, the reader, to decide if you find them of interest.  I will add to these pages as time permits and as subjects present themselves.

These first four pictures illustrate the most basic elements that I cannot function without.  A glass work surface, good lighting, and magnification.  Glass provides a flat surface that can be cleaned, Fig. 1.  I put some sort of blue material underneath (in this case felt) because blue has been shown to be the most restful color for your eyes.

I always use a combination lamp over my work surface, Fig. 2.  (The image in the glass was done for effect)  Overhead, I use fluorescent tubes, Fig. 3.  The key to fluorescents are that they need to be color balanced.  Do not confuse color balance with color temperature.  If you look on the label of fluorescents, you will see two numbers: Color Temperature and CRI (color rendering index).  It is essential that you understand the difference.  Color temperature refers to the temperature of the total wavelength of the tube but does not describe the recipe of the spectrum elements that generate that temperature.  The CRI relates to how close is the tube’s balance of spectrum elements when compared to sunlight.  In other words, you can use many different mixes and come up with 5000K but what is essential is the spectrum mix be as close to sunlight as possible.  The minimum CRI for any sort of color accuracy is 90.  The gold standard was the T12 Chroma 50’s.  Today, the current standard size tube is the T8 that have only recently become available in high CRI tubes.  Color balanced CFL’s are available through photographic equipment suppliers and color balanced circular fluorescents are also available.  To understand the importance of these lighting elements, I can suggest no better source than chapter 1 in the book, “Color Management,” by Bruce Fraser, Chris Murphy, and Fred Bunting.

Lighting Paul Budzik Workbench Fine Scale Models

Another essential is magnification.  I have used these loupes for many years.  There are any numbers of ways to provide magnification of your work.  Your choice is going to probably depend on your eyesight and budget.  I would suggest that you don’t just settle for something unsatisfactory.  If you can’t see it, you can’t build it.

Admittedly, I am a tool hound.  A condition I can surely blame on my father for the endless childhood hours spent in hardware stores and the tool departments of Sears and Wards.  So here are a most of the sprue cutters that I own, Fig. 5.  However, the only ones that I generally use are the Tamiyas (A) and the inexpensive Radio Shack clippers (B).  The Tamiya cutters just simply seem to work the best and I use them for fine cutting.

Loupes Paul Budzik Workbench Fine Scale Models
Sprue Cutters Paul Budzik Workbench Fine Scale Models

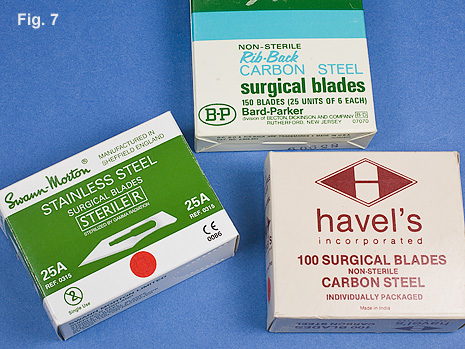
For the most part, the only hobby knife that I use (A), Fig. 6.  The handle is made by Bard-Parker.  It accepts all the standard larger surgical blades shown in figure 7.  A complete description is shown in the video below.

Lesser expensive handles (B & C) are available from Havel’s.  I still have all my old Xacto handles left over from when I was 10, but the round handles are too dinky in my hand and the blades are just not sharp enough.  Along with my choice of a hobby knife, I find it is essential to have a small sharpening stone handy to keep the edge sharp, Fig. 8.  My favorite is a Norton, India Fine, 4” bench stone, #85585-4 (A).  Hard Arkansas surgical stones (B) are also handy to have, but the Norton stone does a very nice job and does it quickly.

Knives Paul Budzik Fine Scale Models Workbench
Blades Paul Budzik Fine Scale Models Workbench
Sharpening Stones Paul Budzik Fine Scale Models Workbench

Files are the backbone of my workbench.  I have a large selection of jeweler’s files, Fig. 9, and standard size files, Fig. 10.  Note that the files are convenient yet carefully stored and not just thrown on top of each other.  I have an individual page devoted to files and different file types, here.

Files Paul Budzik Fine Scale Models Workbench
Measuring Tools Paul Budzik

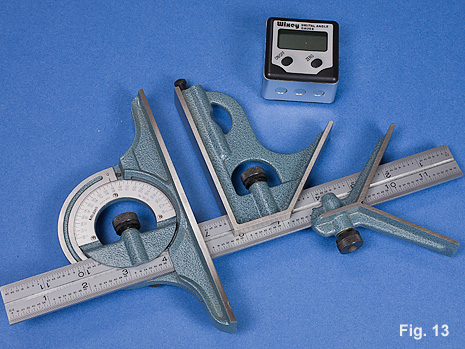
I use a wide variety of measuring tools, Figs. 11 – 13.  I find that a good combination square and digital angle gauge are indispensible for scratch building, Fig. 13.  For further information about measuring tools, I have an individual web page devoted to the different types and their use (here) as well as the video below.

Measuring Tools 2 Paul Budzik