With the gear out of the way, I thought I was on easy street. But the eccentric spirit of Sidney Camm struck again in the form of the drop tanks. While researching the drop tanks, I discovered that the fairings for the tanks were a clear plastic. Creating the fairing out of clear material seemed rather daunting and it looked as though the easy way out would be to forget about the tanks all together. However, I felt that just like dropping the flaps, the tanks provide a lot of visual interest and I really wanted to display them because they were a common feature. What transpired was a lengthy journey into the world of resin casting at which I, freely admit, am still a novice. I began by creating the master from wood and acrylic. I was then able to generate a two part rubber mold. The mold was split in an unorthodox manner in order to move the parting line away from the clear fairing and allow for replacement of the tank within the mold, Fig. 1.


Note that a key was created in the pattern, Figs. 2, 3. The tank was cast in resin, Fig. 3. The fairing was sectioned off and the tank was painted medium sea grey. Some hose detail was added and the tank was then replaced in the mold, Fig. 4. The key at the bottom of the tank keeps the tank properly positioned in the mold.


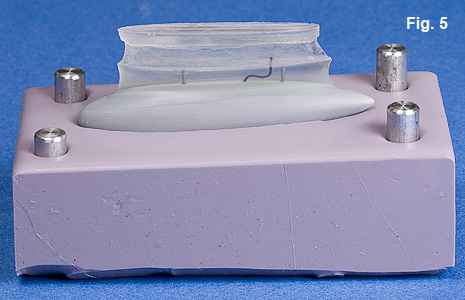
The top half of the mold is replaced and clear epoxy casting resin was then poured into the top of the mold, Fig. 5. The excess material was removed from the top of the fairing and a brass pin was placed, Fig. 6.

The position of the tank was located by using the brass pin placed in the previous step. The adaptation of the fairings to the underside of the wing was improved by using a mixture of clear dental acrylic powder and gap filling cyanoacrylate, Fig 7. Bare Metal Foil acts as a separator. Decals were later applied to the side to simulate the reinforcing plates, Fig. 8. Although not highly visible, I regret that I was unable to adequately simulate the perforated reinforcing bands that run horizontally around the inside of the fairing.


Before painting, a few elements needed to be sorted out: What paint to use and how to apply the camouflage pattern? The decision was between WEM and Gunze Mr Color. The out-of-the-bottle color was tested against some very accurate paint cards (shown in the center). I chose the Gunze mainly because it is a lacquer of sorts.
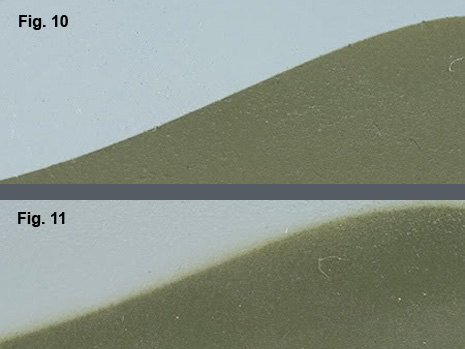
The other issue was how to get the right amount of fade between the colors. The specs called for a line of demarcation that was 1.5” in width. After a bit of experimentation, I found if I used a bit of fine cord to raise the edge of the mask (Fig. 9) I could get a consistent pattern as in Fig. 11. This was sufficiently different from a hard edge, Fig. 10.
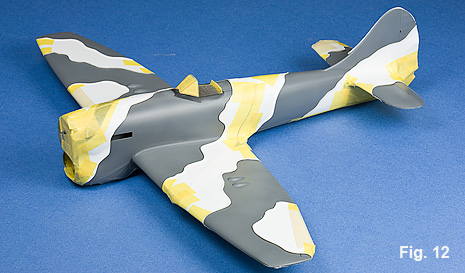
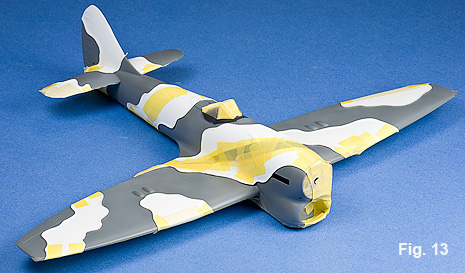
I drew the camouflage pattern on paper covering the model. The paper was removed and scanned. The design was cleaned up in an illustration program and then sent to the vinyl cutter. The underside was shot with Mr Color 363, Medium Sea Gray, and then post shaded with various darkened and lightened mixtures of the base color. The underside was masked off and the upper surface was painted in Mr Color 362, Ocean Gray, followed by the same post shading technique. Before the vinyl mask was applied, crochet cord was applied to the sticky side of the mask about 2-3mm inside of the edge. The cord kept the edge off the surface equally along the camouflage line and softened the demarcation about the right amount. The Dark Green I used was Mr Color 361, and once again it was post shaded.


Next, the code letters were masked off and painted with Mr Color 368, Sky, Fig. 16. The leading edge stripes were masked and painted with WEM RAF Yellow, Fig. 17. The roundels are decals supplied by MDC. The Mr Color surface is a nice semi gloss, so I applied the decals right over the paint.


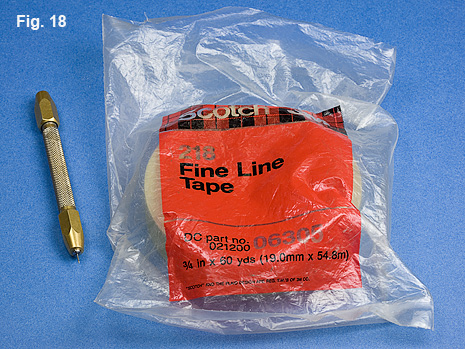
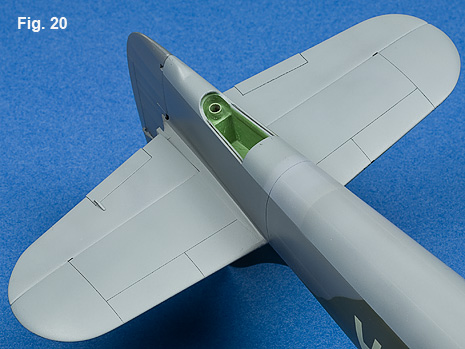
Now the fun began as I needed to start scribing. The process is quite simple and goes rather quickly. Scribing is done with a sharpened piece of .028” stainless steel wire held in a pin vise. For a guide, I used a piece of .015 styrene for straight lines like those on the wing or 3M Fine Line tape for the lines that follow a curved surface. For access panels, I cut a stencil in .005” brass. The extreme delicacy and crispness of the lines can be seen in figures 19 – 21.


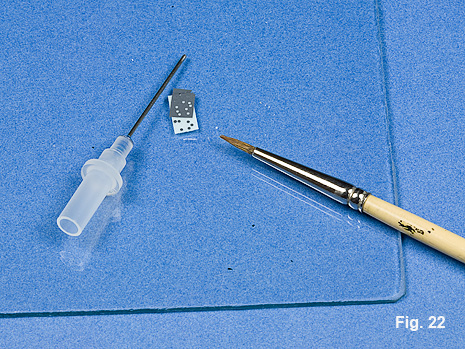
Fasteners for the removable panels were cut with a sharpened syringe from solid color decal paper, Figs. 22, 23
Once the scribing was done, I applied the custom transfer stenciling and aircraft numbers. The entire aircraft was over coated with a light coat of a mixture of Testors Dullcote and Glosscote. Some additional weathering and paint chipping was done with colored pencils and pastels. A final over coating of the same Dullcote/Glosscote mixture was applied. As a final touch, I went over the entire surface with a fine sanding sponge to remove any grain.

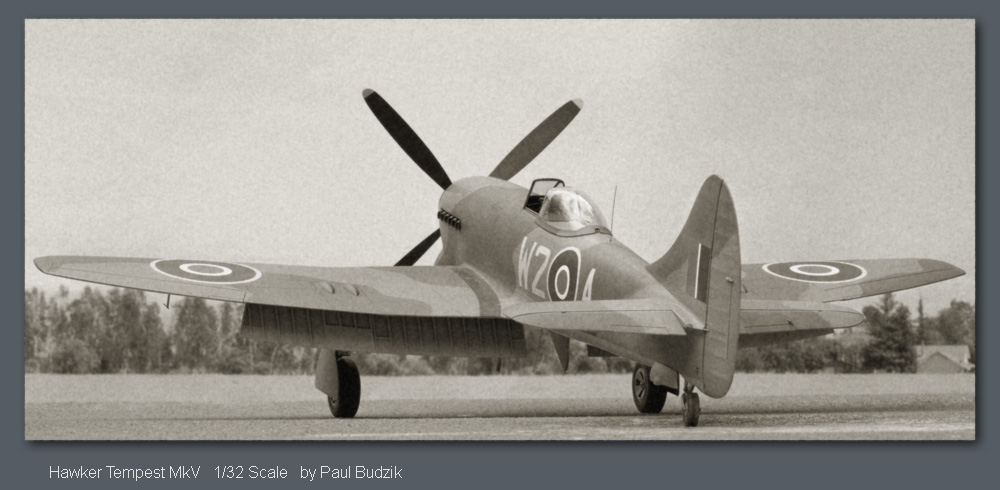
The model was completed in time for the IPMS 2007 National Convention where I was able to meet A. L. Bentley.
A special thanks to Christer at the Hawker Tempest Page for maintaining a wealth of prototypical information. This site is invaluable for anyone interested in the Tempest.
This project was much more enjoyable because I was able to share the process with the group at Large Scale Planes. The Large Scale Planes forum is one of the most supportive and encouraging groups that I have found on the net. I would strongly urge you to visit their site.
For a photographs of the completed model click here

Avery, Max with Shores, Christopher. Spitfire Leader: The Story of Wing CDR Evan “Rosie” Mackie. London: Grub Street, 1997
Bentley, A. L. Hawker Tempest, An Appreciation of a Famous Aeroplane. Scale Models, February 1973
Jones, R. C. Hawker Tornado, Typhoon & Tempest, Camouflage & Markings,RAF Northern Europe 1936-45. London: Ducimus
Mason, Francis K. The Typhoon and Tempest. Bourne End: Aston Publications Ltd., 1988
RAF Museum. British Aviation Colours of World War Two. London: Arms and Armour Press, 1986
Reed, Arthur & Beamont, Roland. Typhoon and Tempest at War. New York: Charles Scribner’s Sons, 1974
Scutts, Jerry. Typhoon / Tempest in Action. Squadron / Signal Publishing, Inc., 1990
Shores, Christopher & Thomas, Chris. 2nd Tactical Air Force. Hersham: Ian Allan Publishing Ltd., 2006
Shores, Christopher & Thomas, Chris. The Typhoon and Tempest Story. London: Arms and Armour Press, 1988
