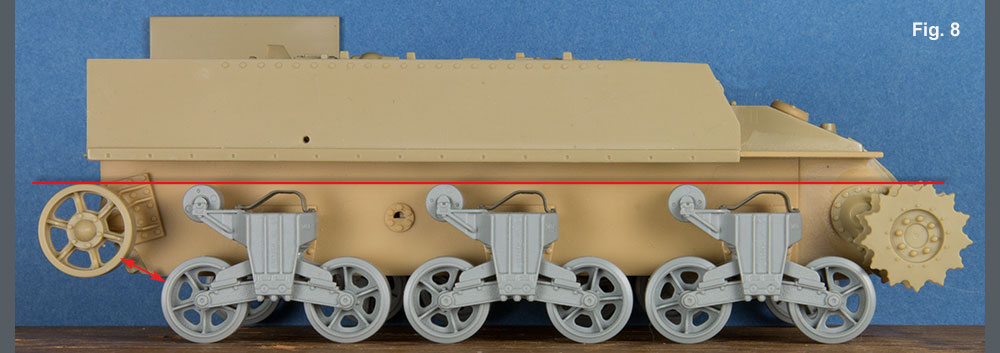
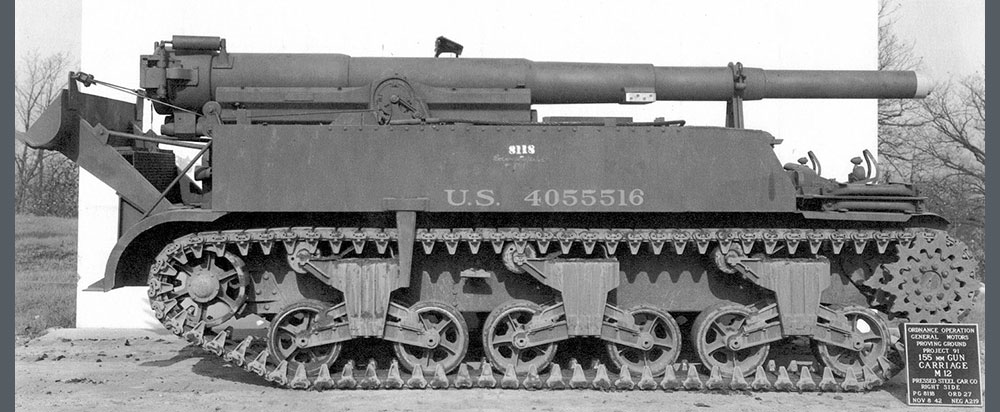
While replacing the suspension bogies improves the height of the vehicle, there are some other issues with the drive train. The placement of the idler wheel on the kit hull is too high. The prototype idler is mounted on an eccentric spindle that is used to adjust the track tension so the actual height of the idler can vary, but the track will still slope upwards to the first return roller. As molded, the kit idler will be at the same height as the return rollers. The discrepancy also shows up as an increased distance between the idler and the rearmost bogie wheel, Fig 8. Compare the position of the idler with the prototype photo below. In addition, depending on what tracks you use, the molded idler mounting plate can be an interference.

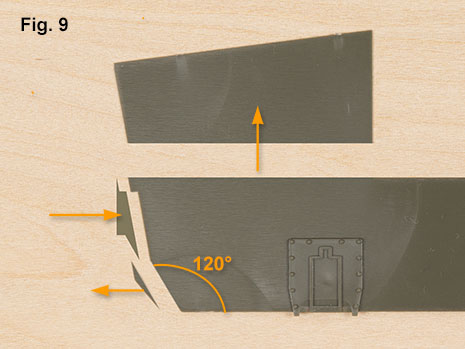
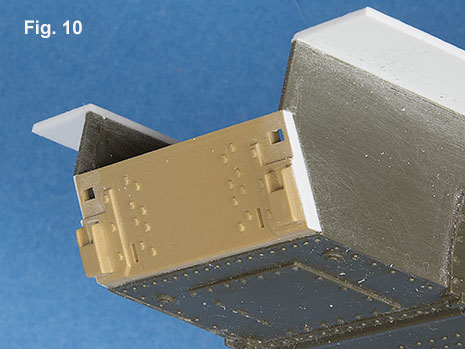
For me, this was the last straw. I am sure it would be possible to redo the idler mount, but I chose a different path. Now was the time to make a number of well needed improvements. The Academy lower hull is actually several scale inches narrower than it should be. Because of this, I decided to use a spare lower hull from a Tasca M4A2 Sherman. This required a bit of surgery (removal and addition) to the rear portion of the hull, Fig 9. I used the Academy rear hull plate, Fig 10. I added a bit of styrene (about .010” after sanding) to each side of the plate to blend it in with the hull sides.
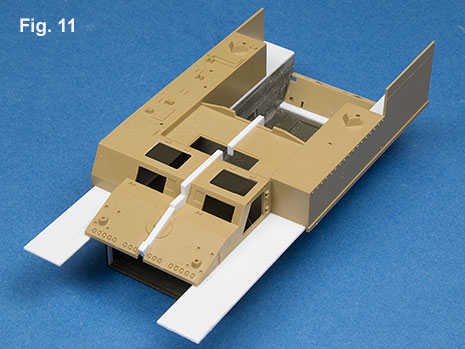
The upper hull molding was cut in half and .080” of styrene was added between the two halves, Fig 11. The method for widening the hull is explained in the video below. The new sponson floor was cut from sheet styrene. While not quite a scale 105”, I was able to increase the width to that of a standard Sherman. This allows the upper hull to mate perfectly with the Dragon three piece final drive assembly that I am using.
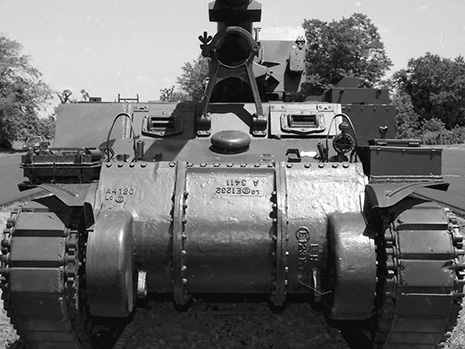
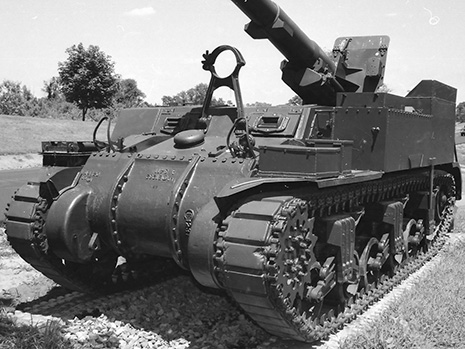
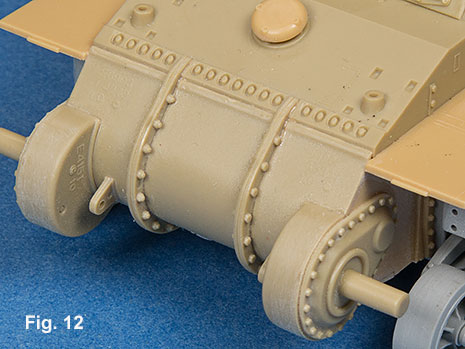
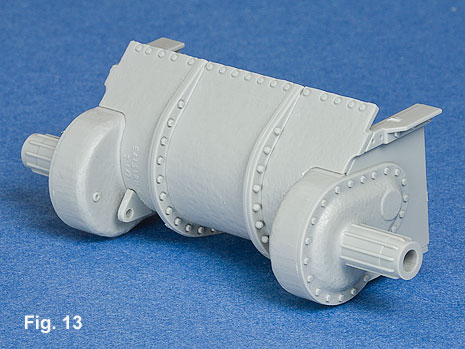
The Academy final drive assembly is a bit toy-like, Fig 12. The most glaring issue is the kit representation of the bolt strip and the FDA casting as it meets the bolt strip. Compare the kit with the prototype photos above. This example, at Aberdeen, has the center differential housing with a bullet guard for the bolt strip. On the other hand, the M12 tech manual shows the M12 with an early three piece FDA without the bullet guard. This style FDA can be found in the Dragon M4A1 DV kit, Fig 13. This is the FDA that I elected to use.
There are a couple of small modifications necessary to use the Dragon FDA. The notches on each side of the casting need to be filled, Fig 14.

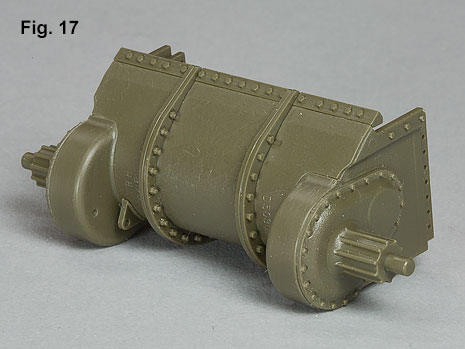
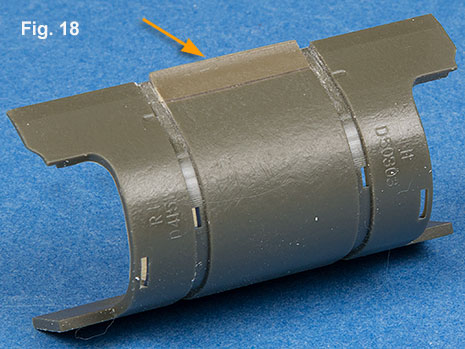
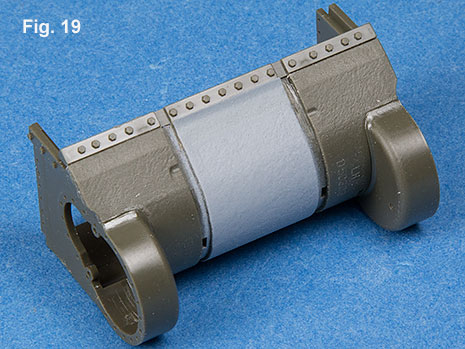
An alternative would be to use the Tasca three piece, Fig. 17. While a slightly different casting, the Tasca uses a separate bolt strip which is difficult to seamlessly blend into the basic FDA molding. However, because the bolt strip is separate, you can modify the center section of the casting as I have done in figure 18. A piece of a spare Tamiya FDA casting was sectioned out and grafted into the central casting of the Tasca FDA, Fig 18 and 19. The casting texture was restored using the method explained here.